How to make a mockup in Photoshop
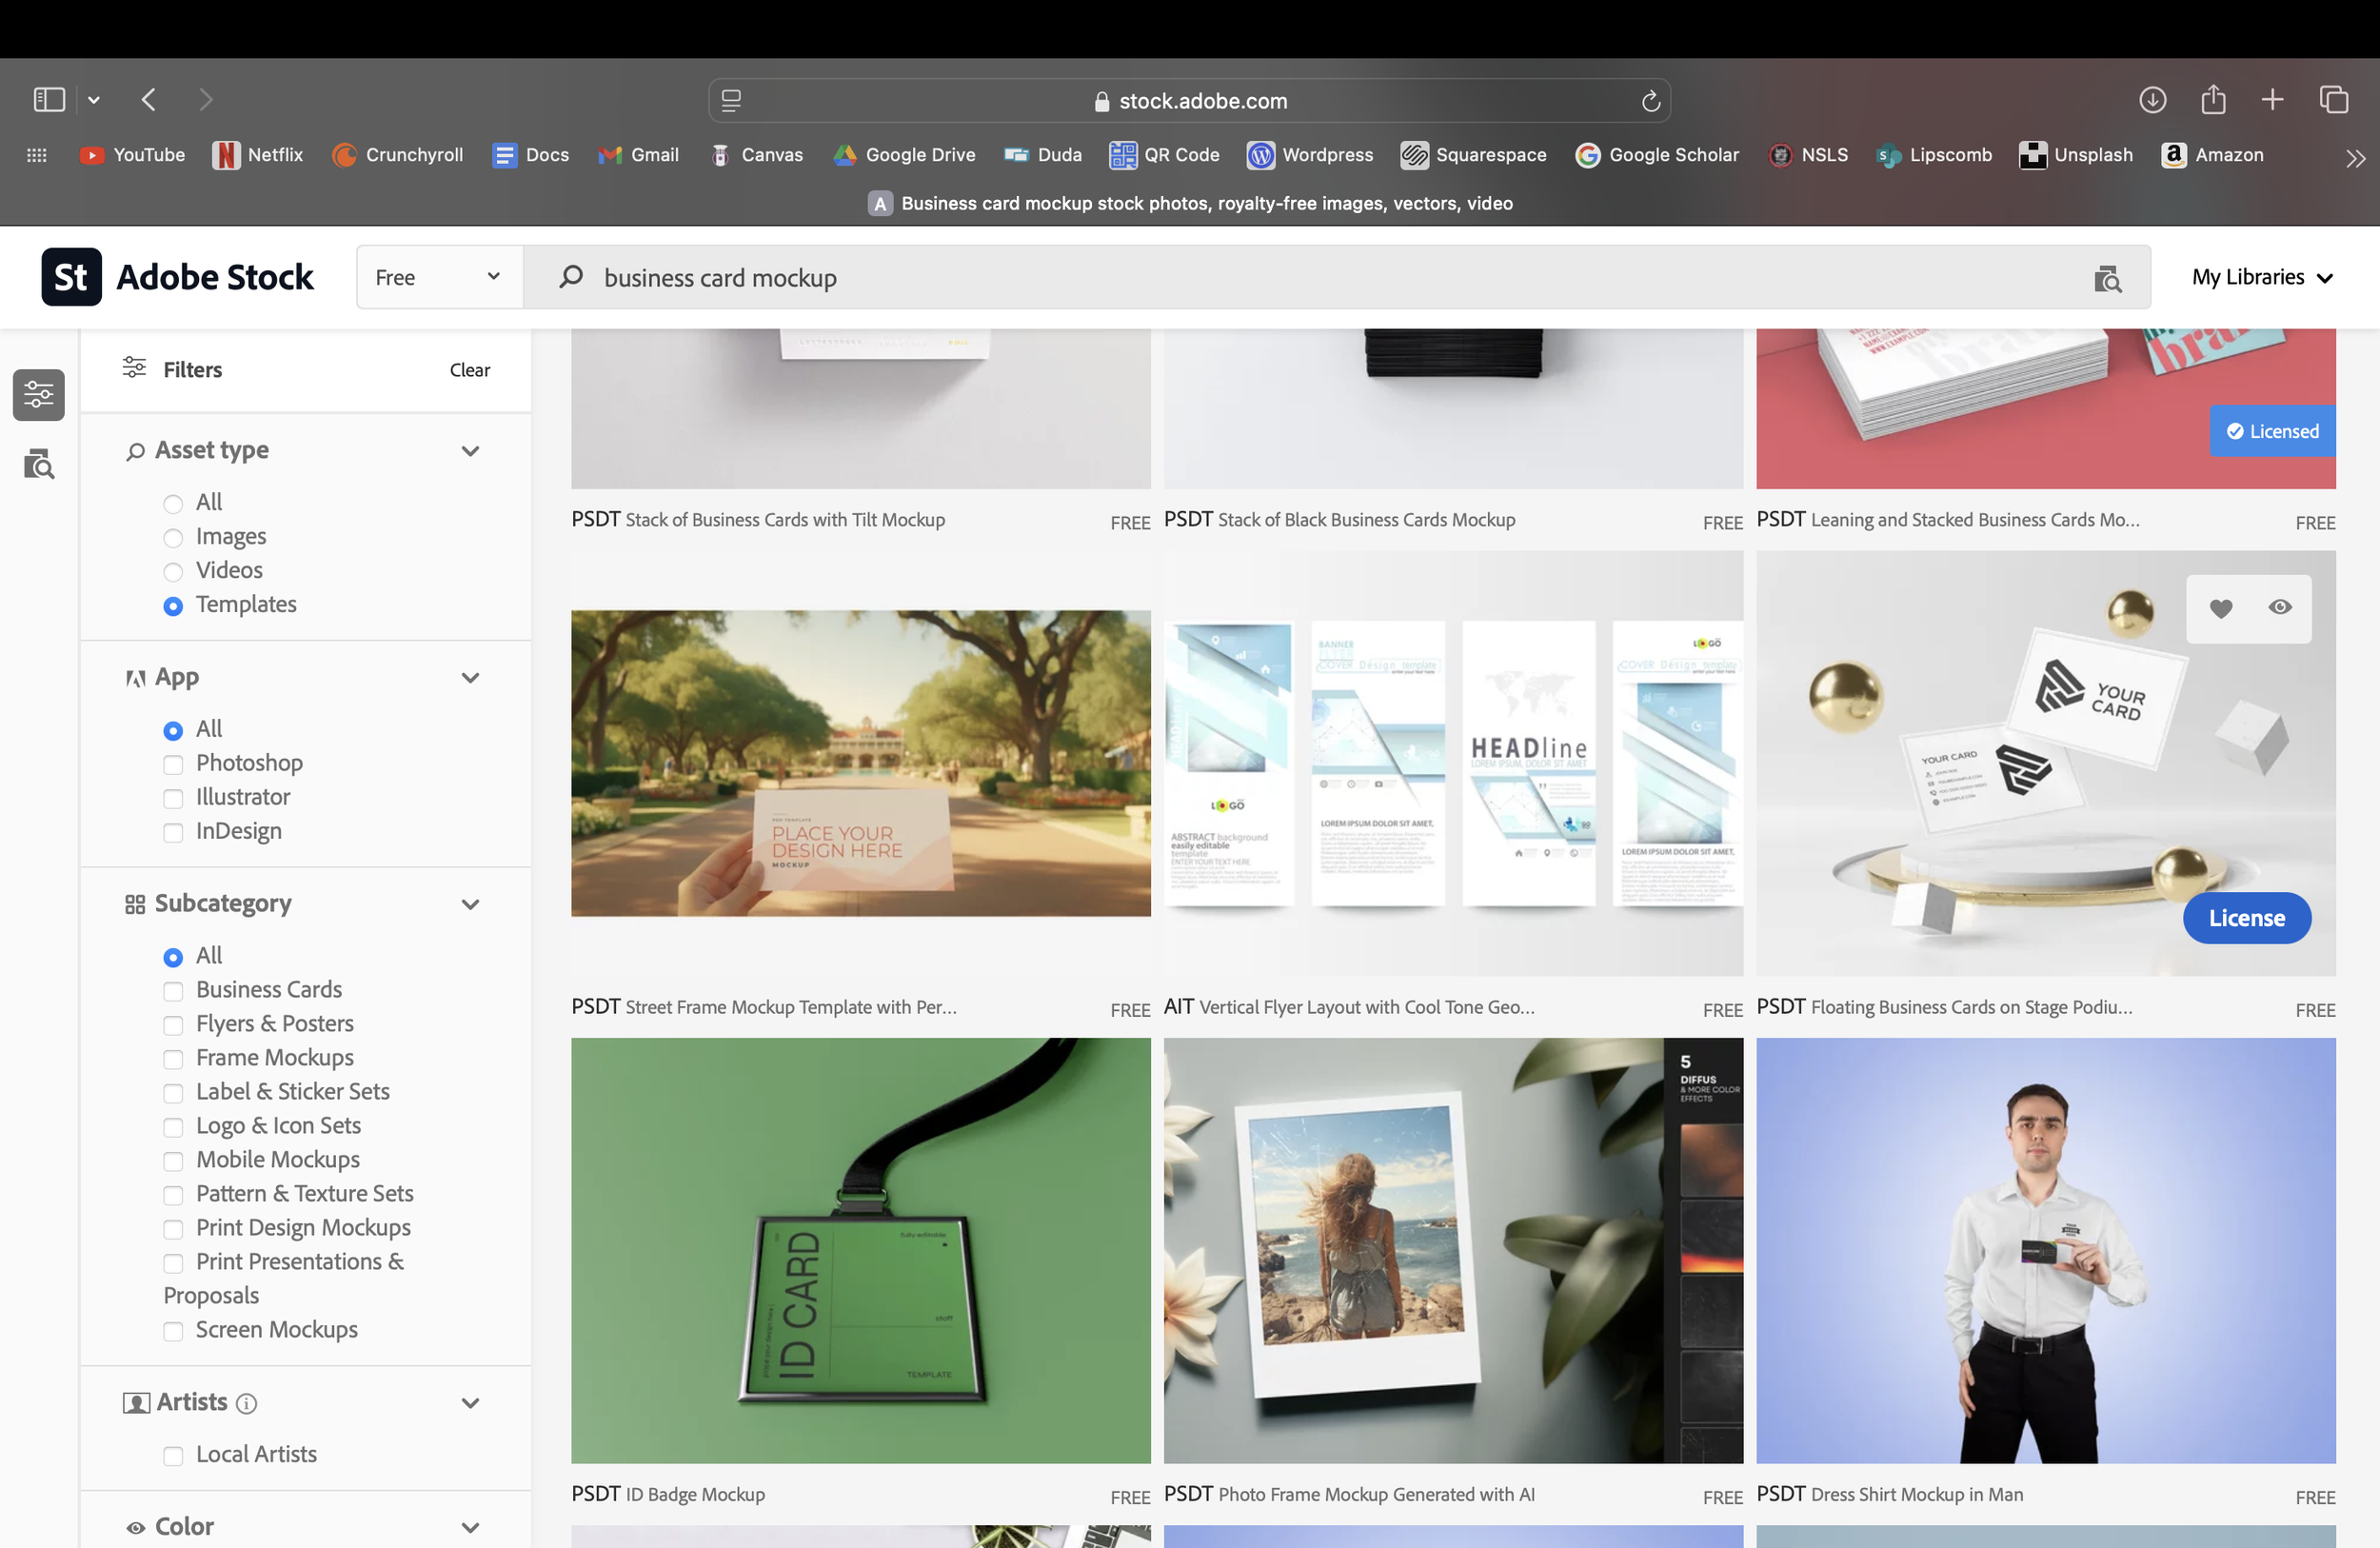
Mockups are an effective way to elevate your designs, presentations, and portfolio. To create a mockup, start by visiting Adobe Stock. Search for the type of template you need, followed by "mockup." To optimize your search, use the following filters:
Search Filter: Free
Asset Type: Templates
Subcategory: All
Once you find a template you like, click "License" to download it to your computer.
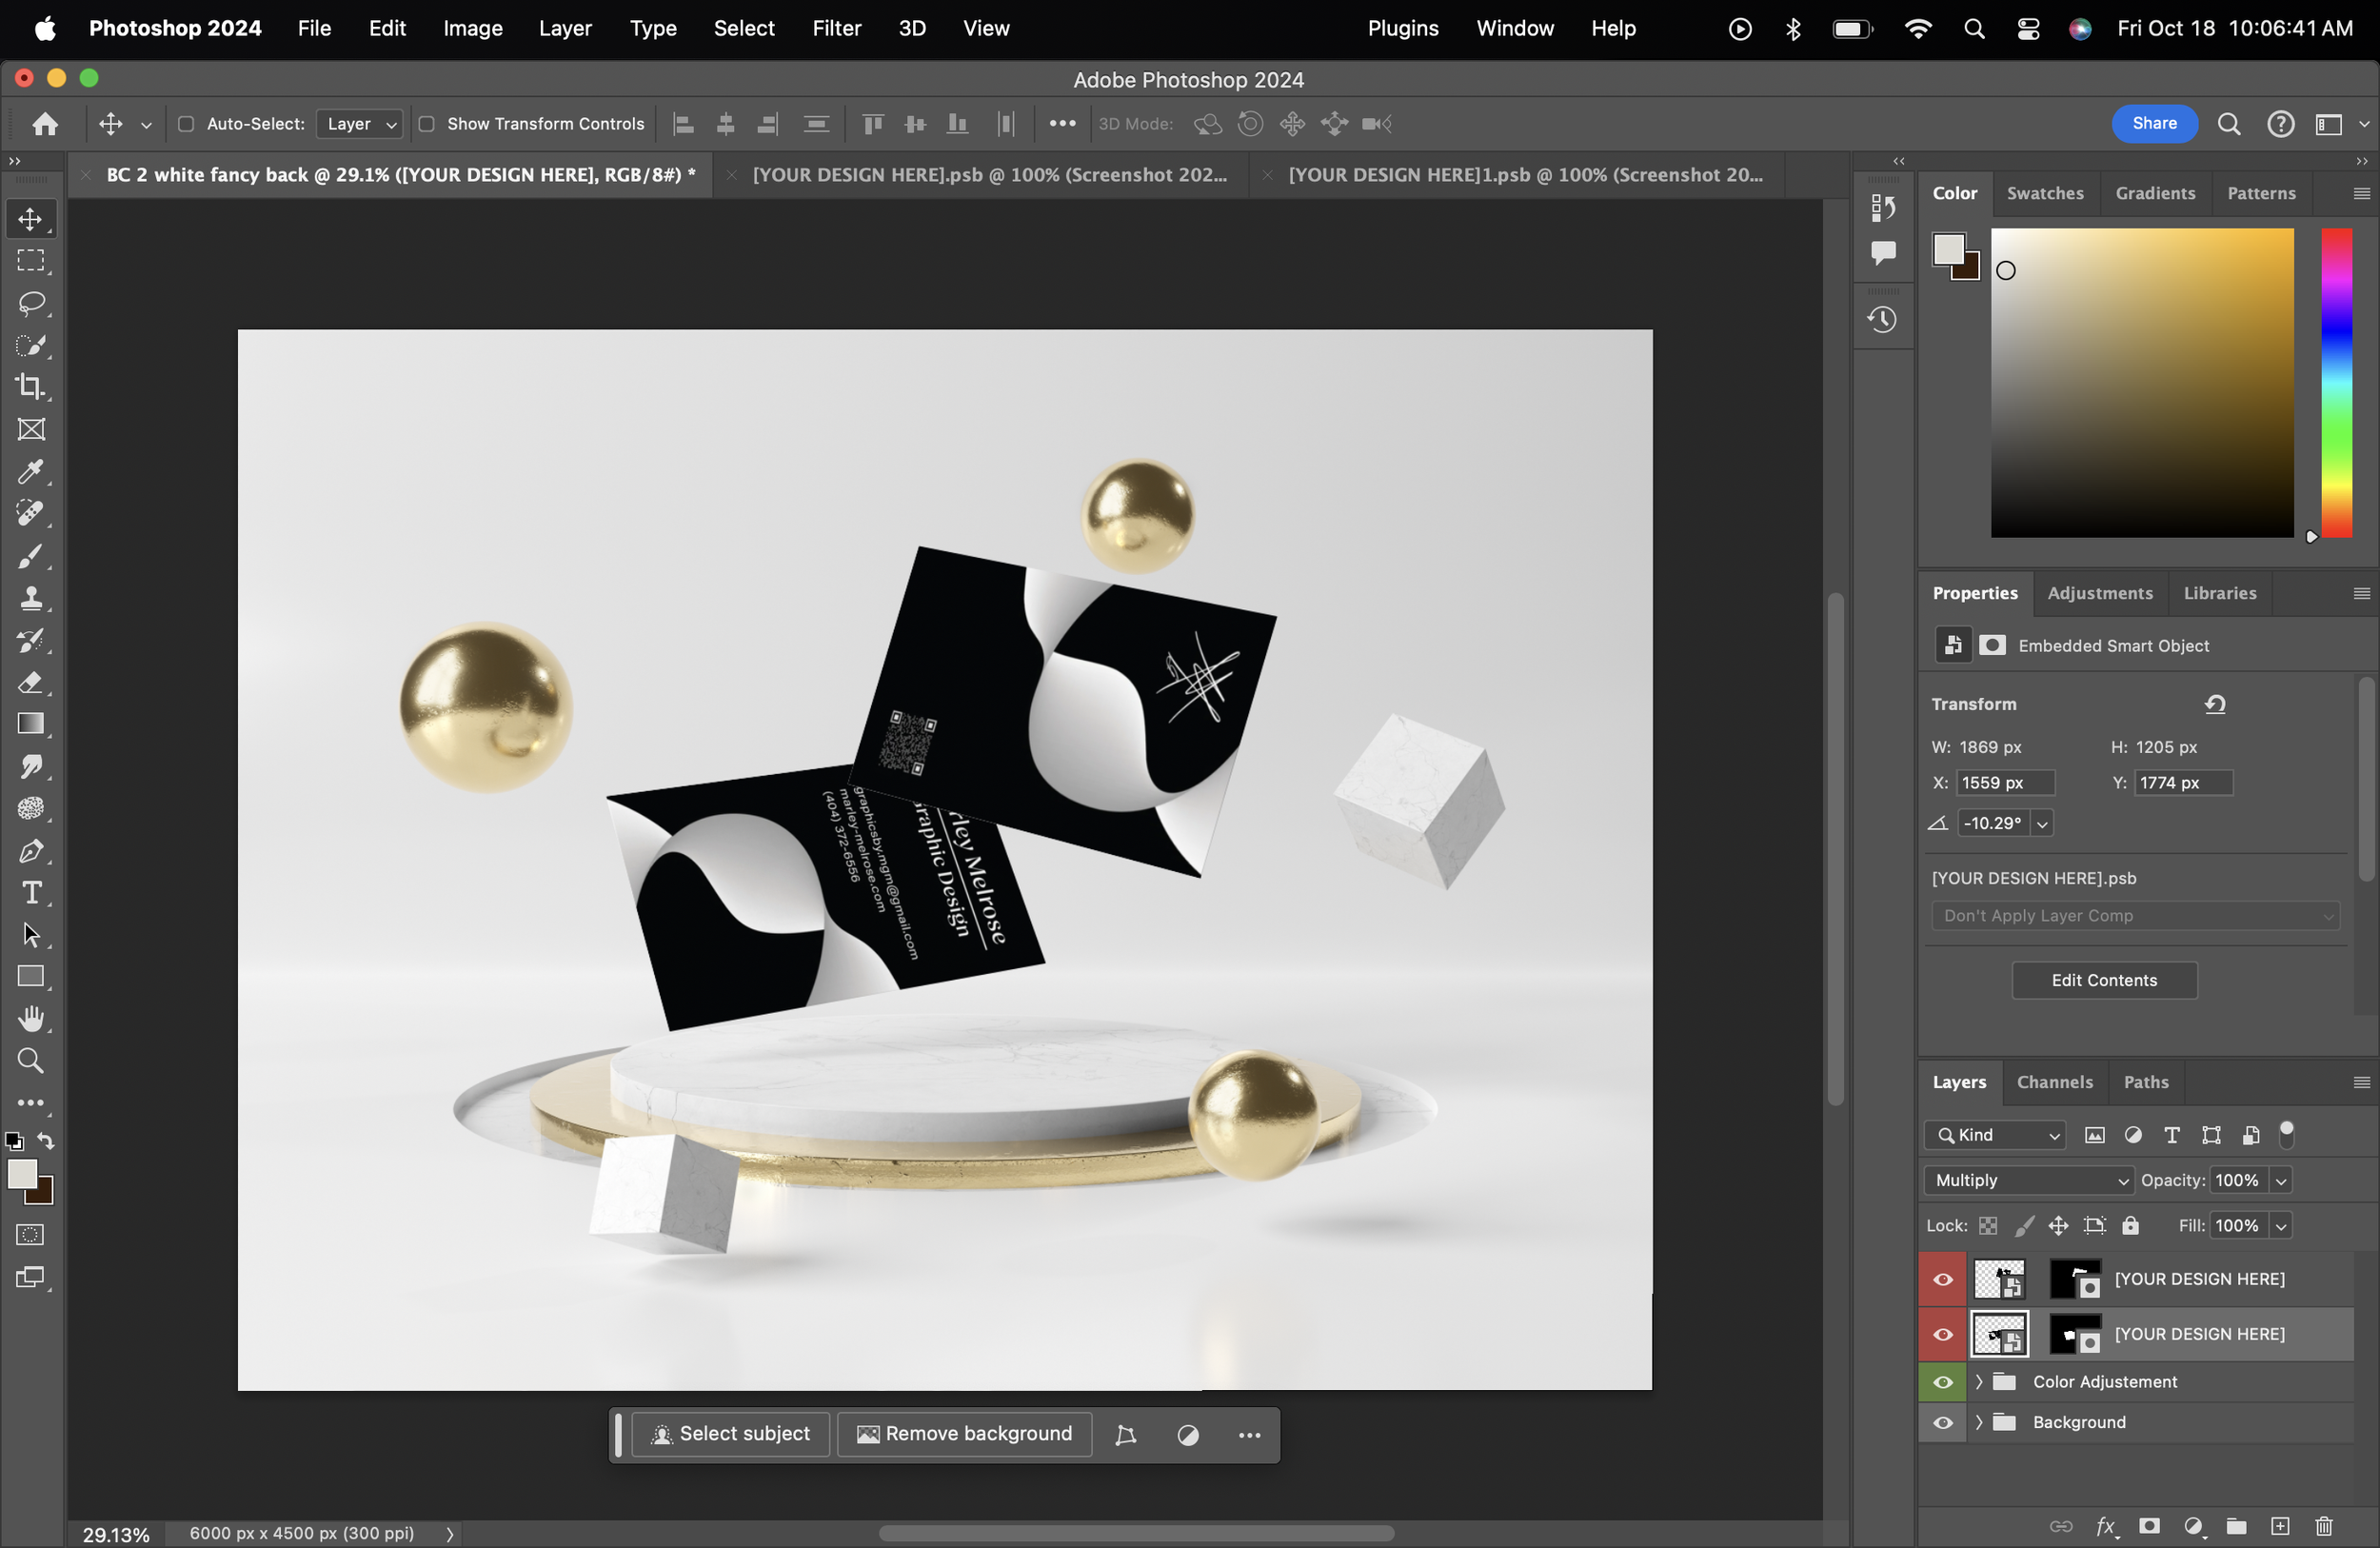
Open the downloaded template in Photoshop.
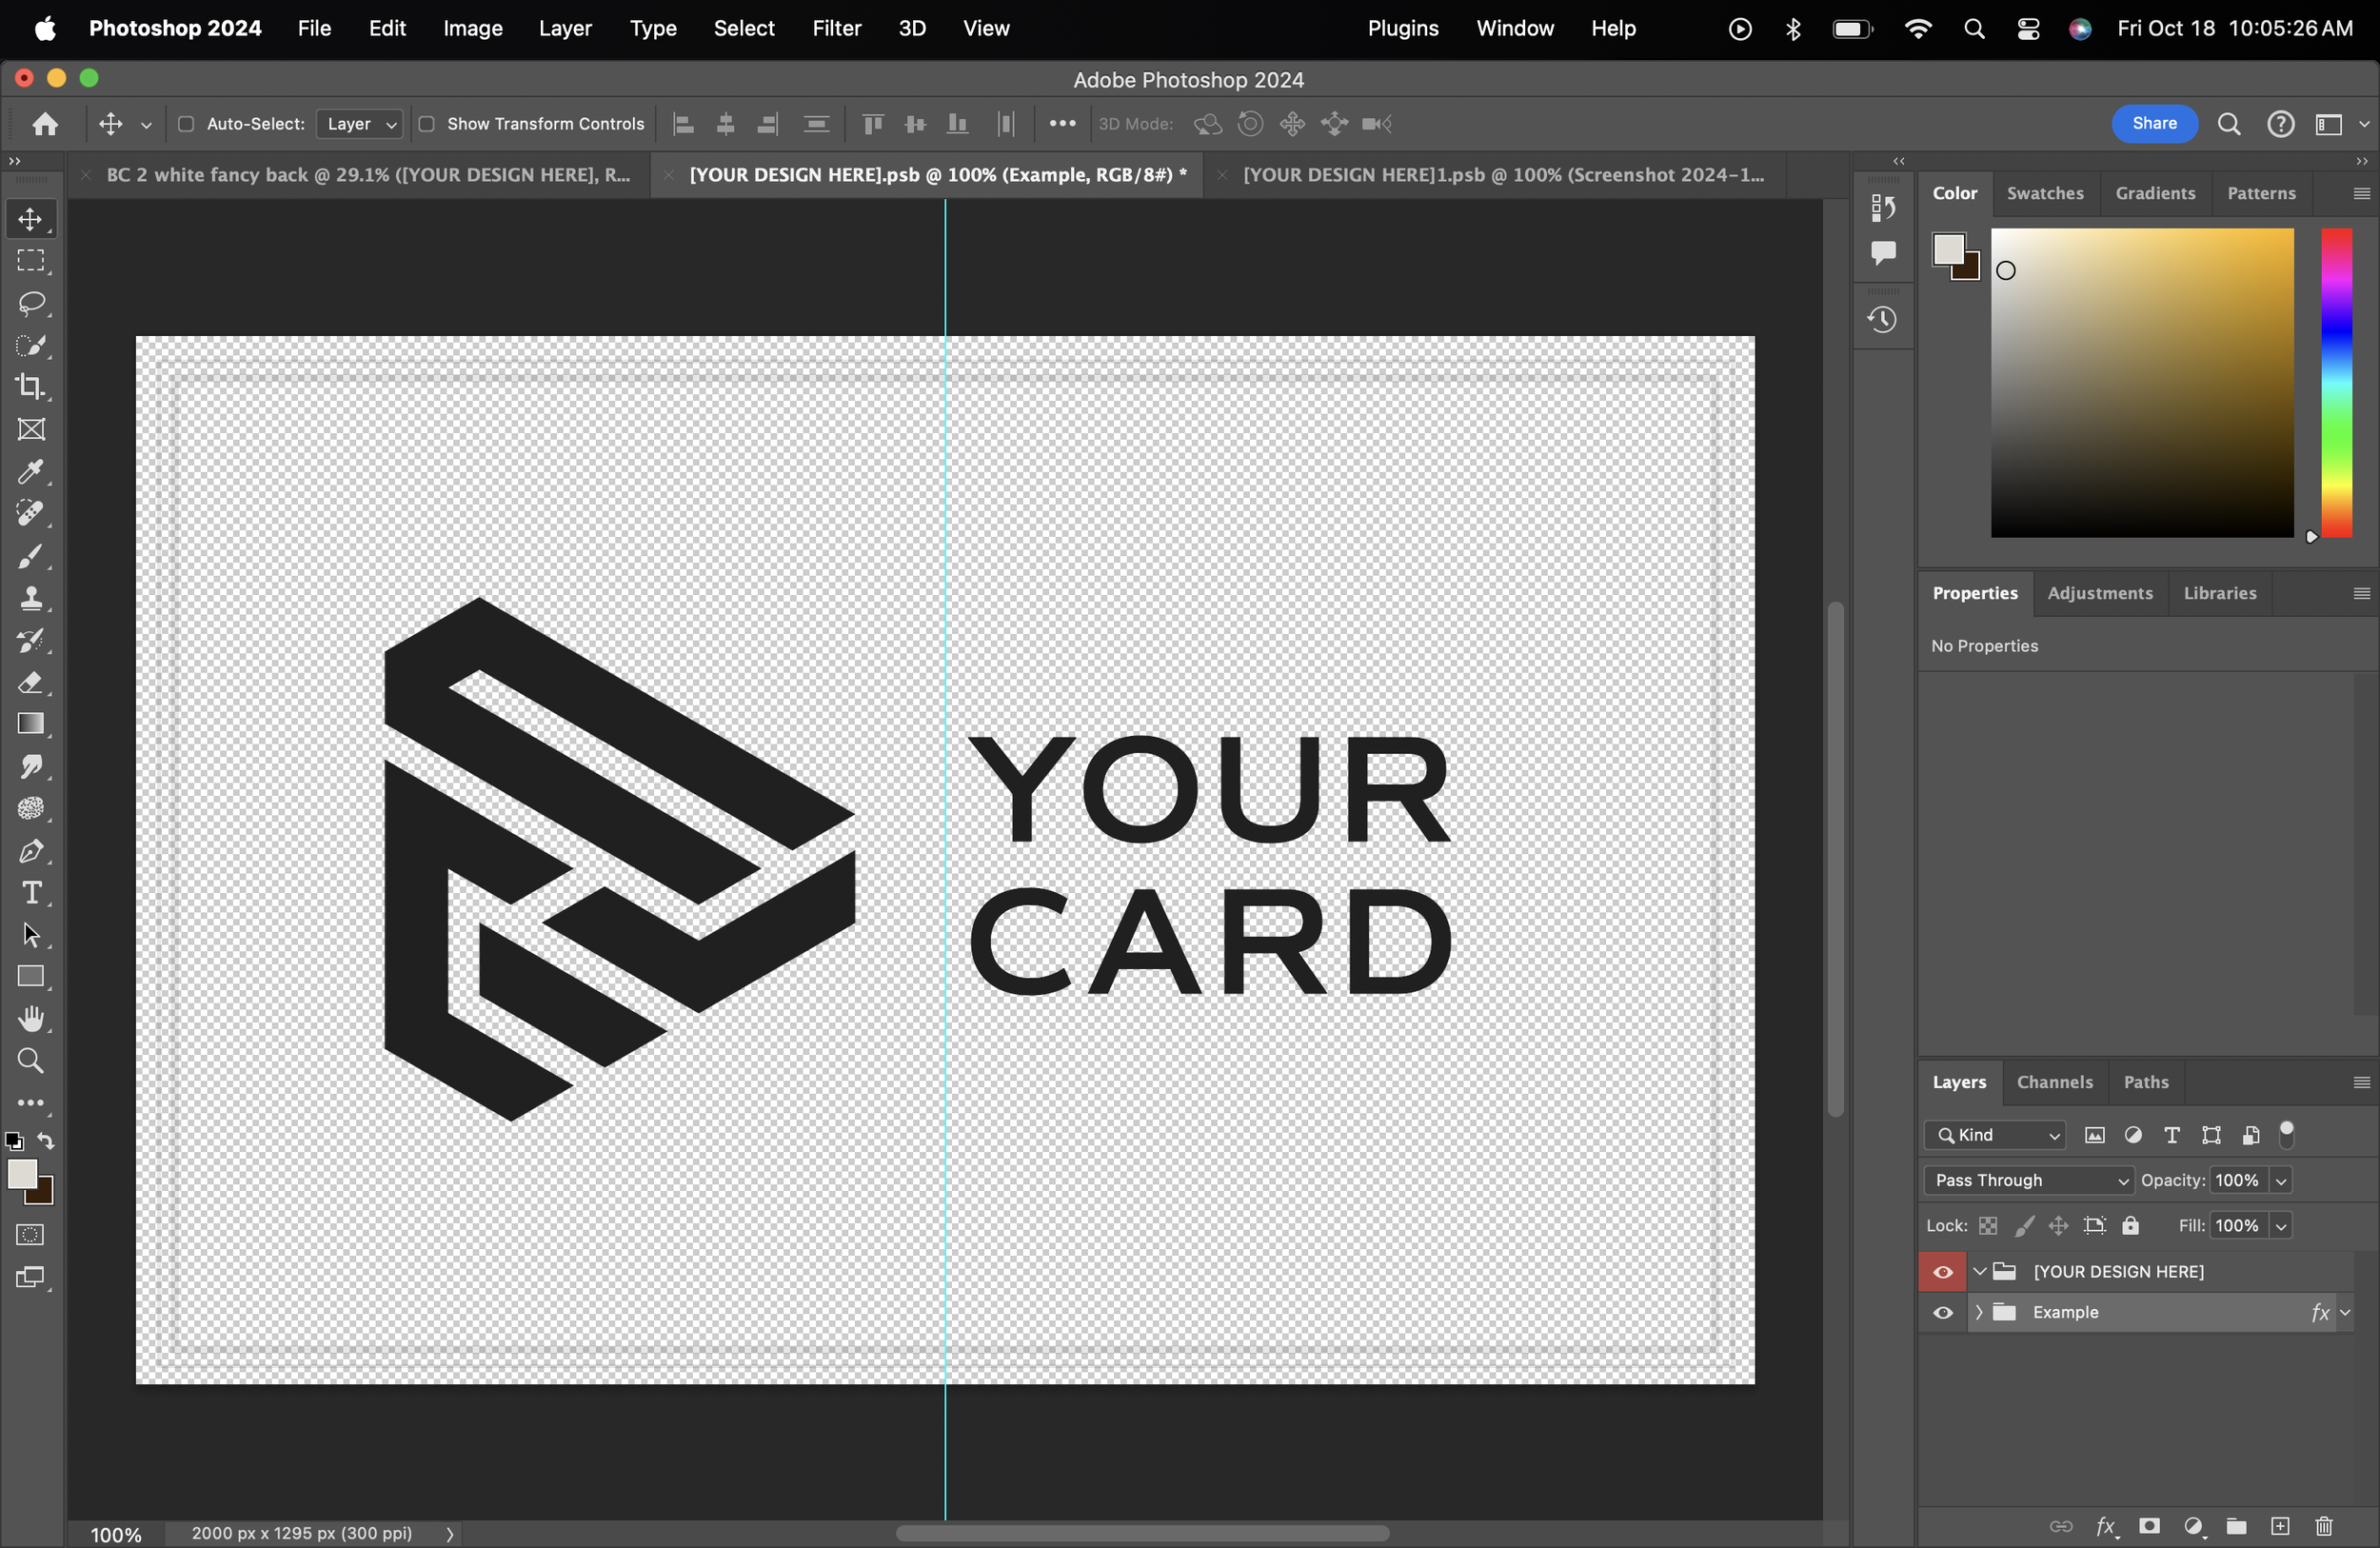
To insert your design, locate a layer with a red eye and click the Smart Object Thumbnail.
A new tab will open in Photoshop, showing a part of the mockup. This is where you can add your design.
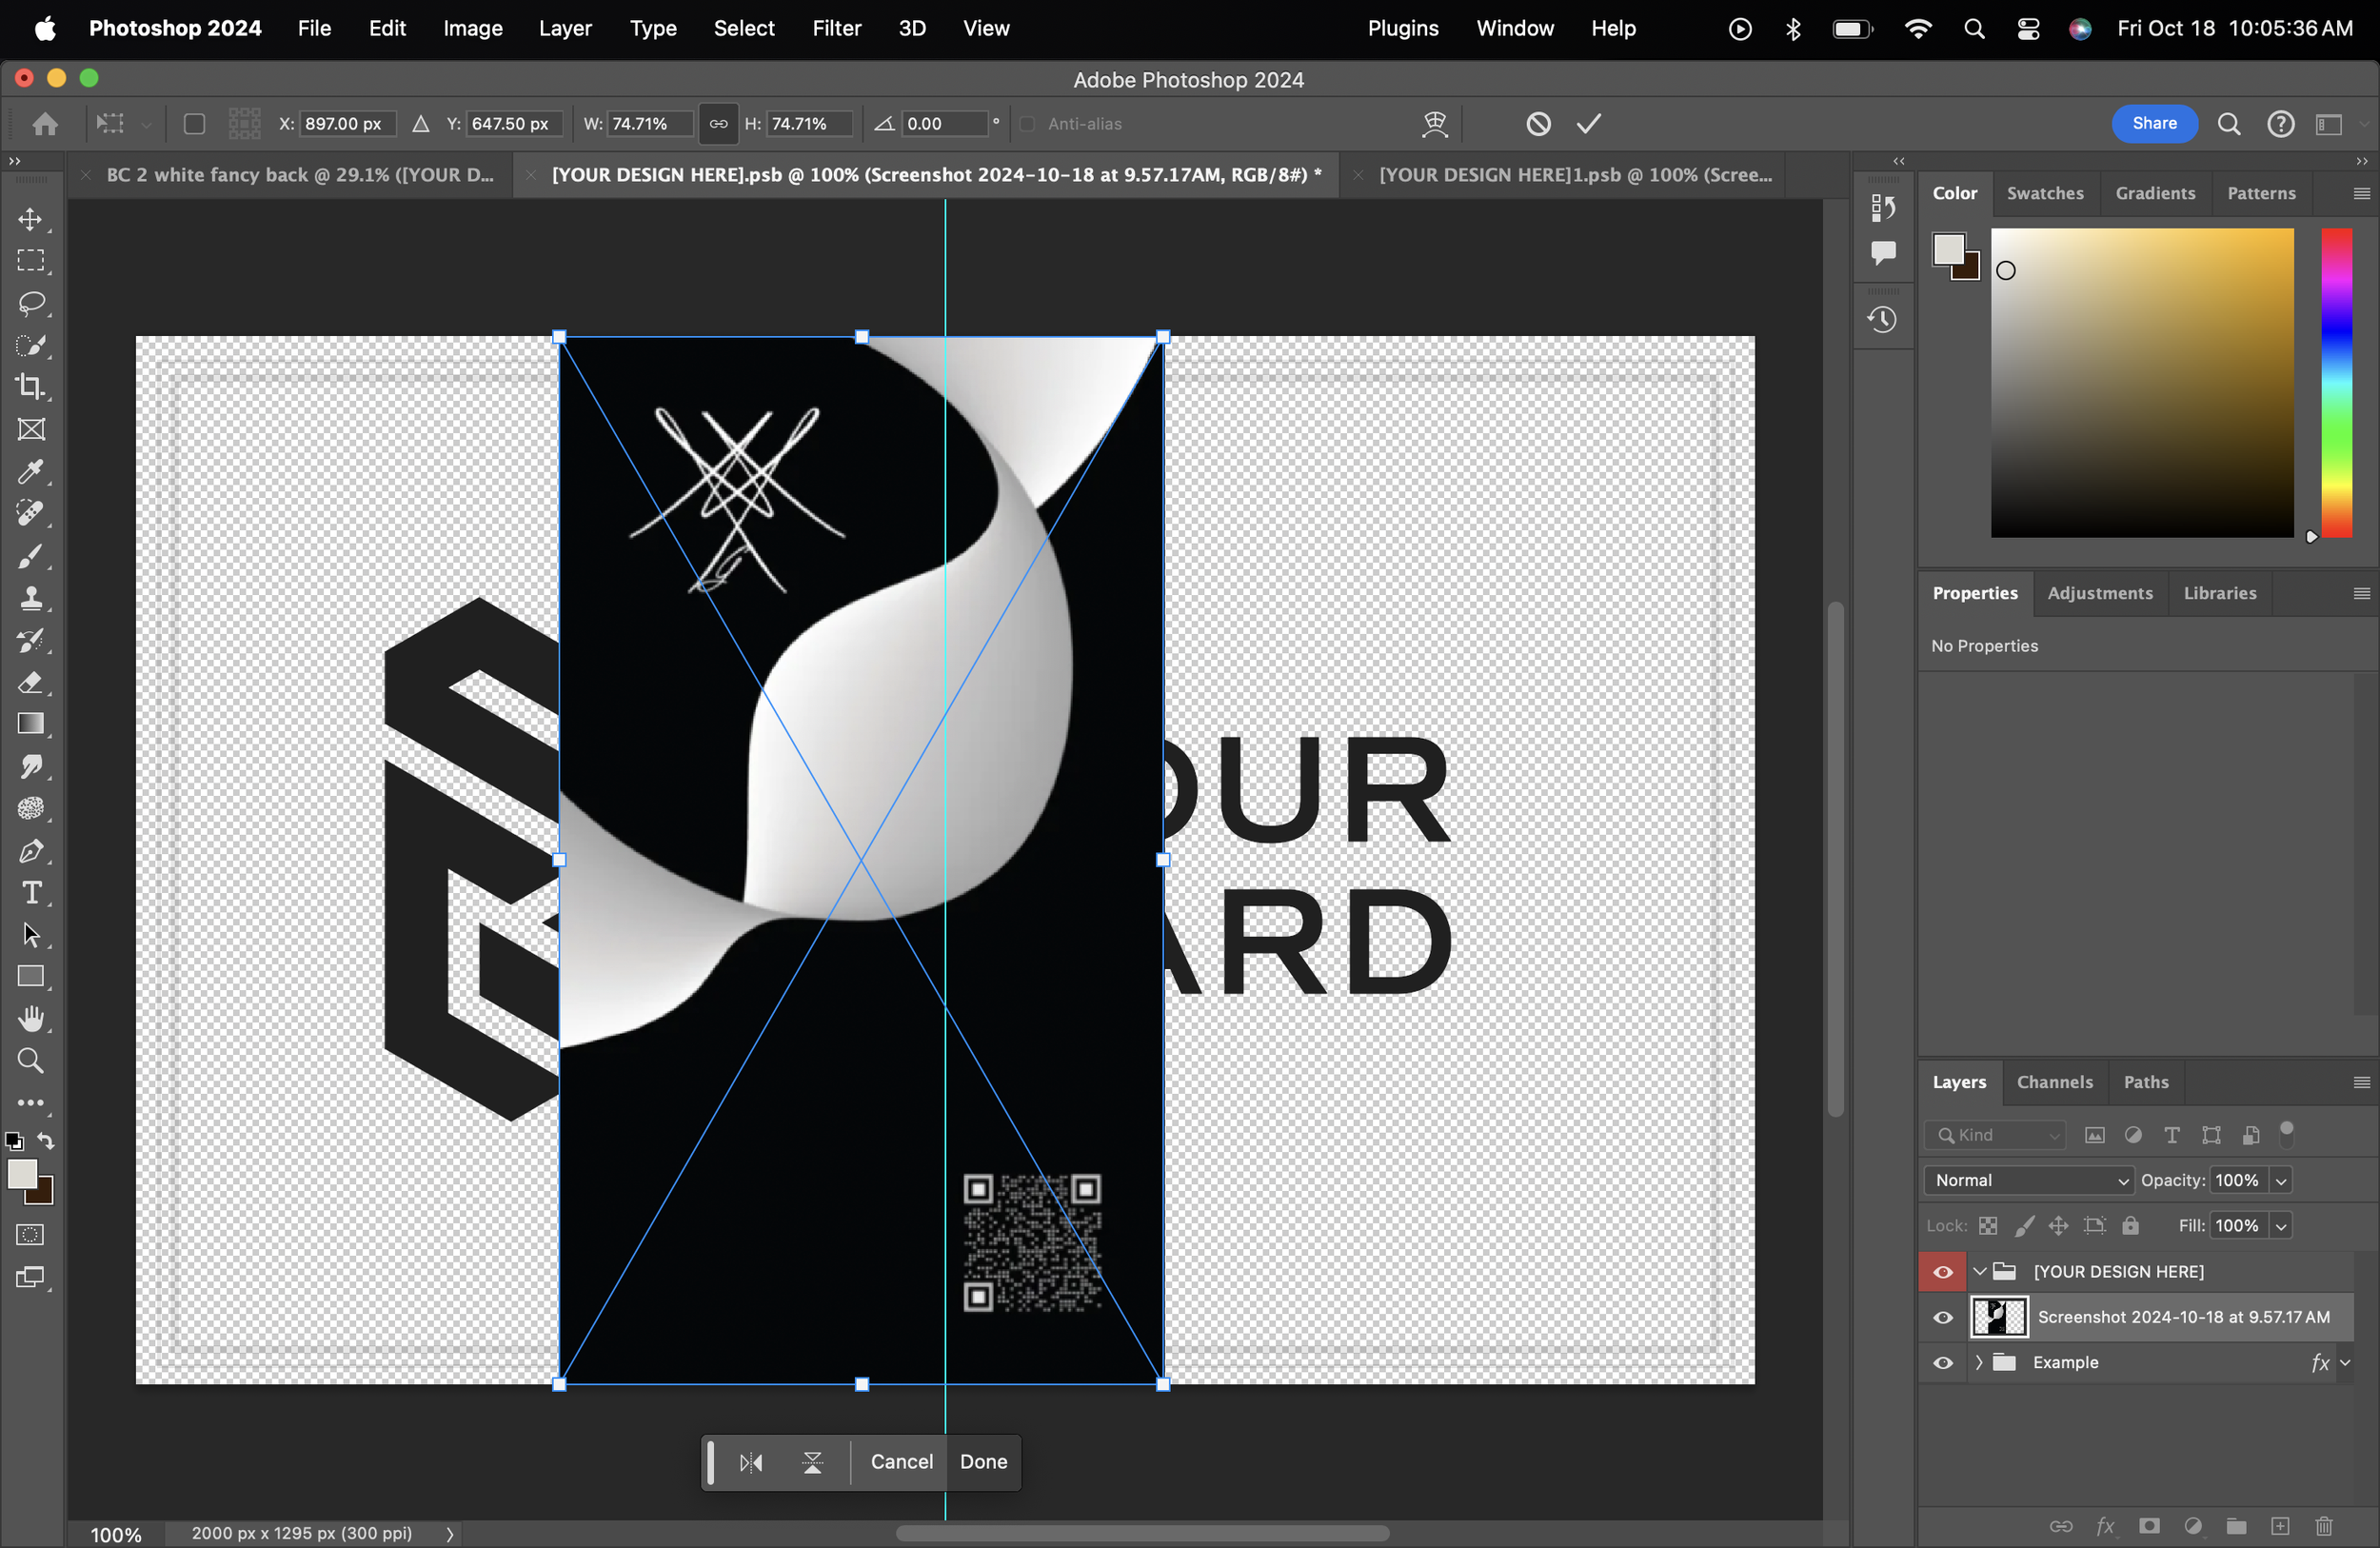
To input your design, either go to File > Open and select your JPEG or drag it from your desktop.
Adjust the design until you’re satisfied with the layout on the mockup.
To save changes, go to File > Save.
This will apply the adjustments to that section of the mockup.
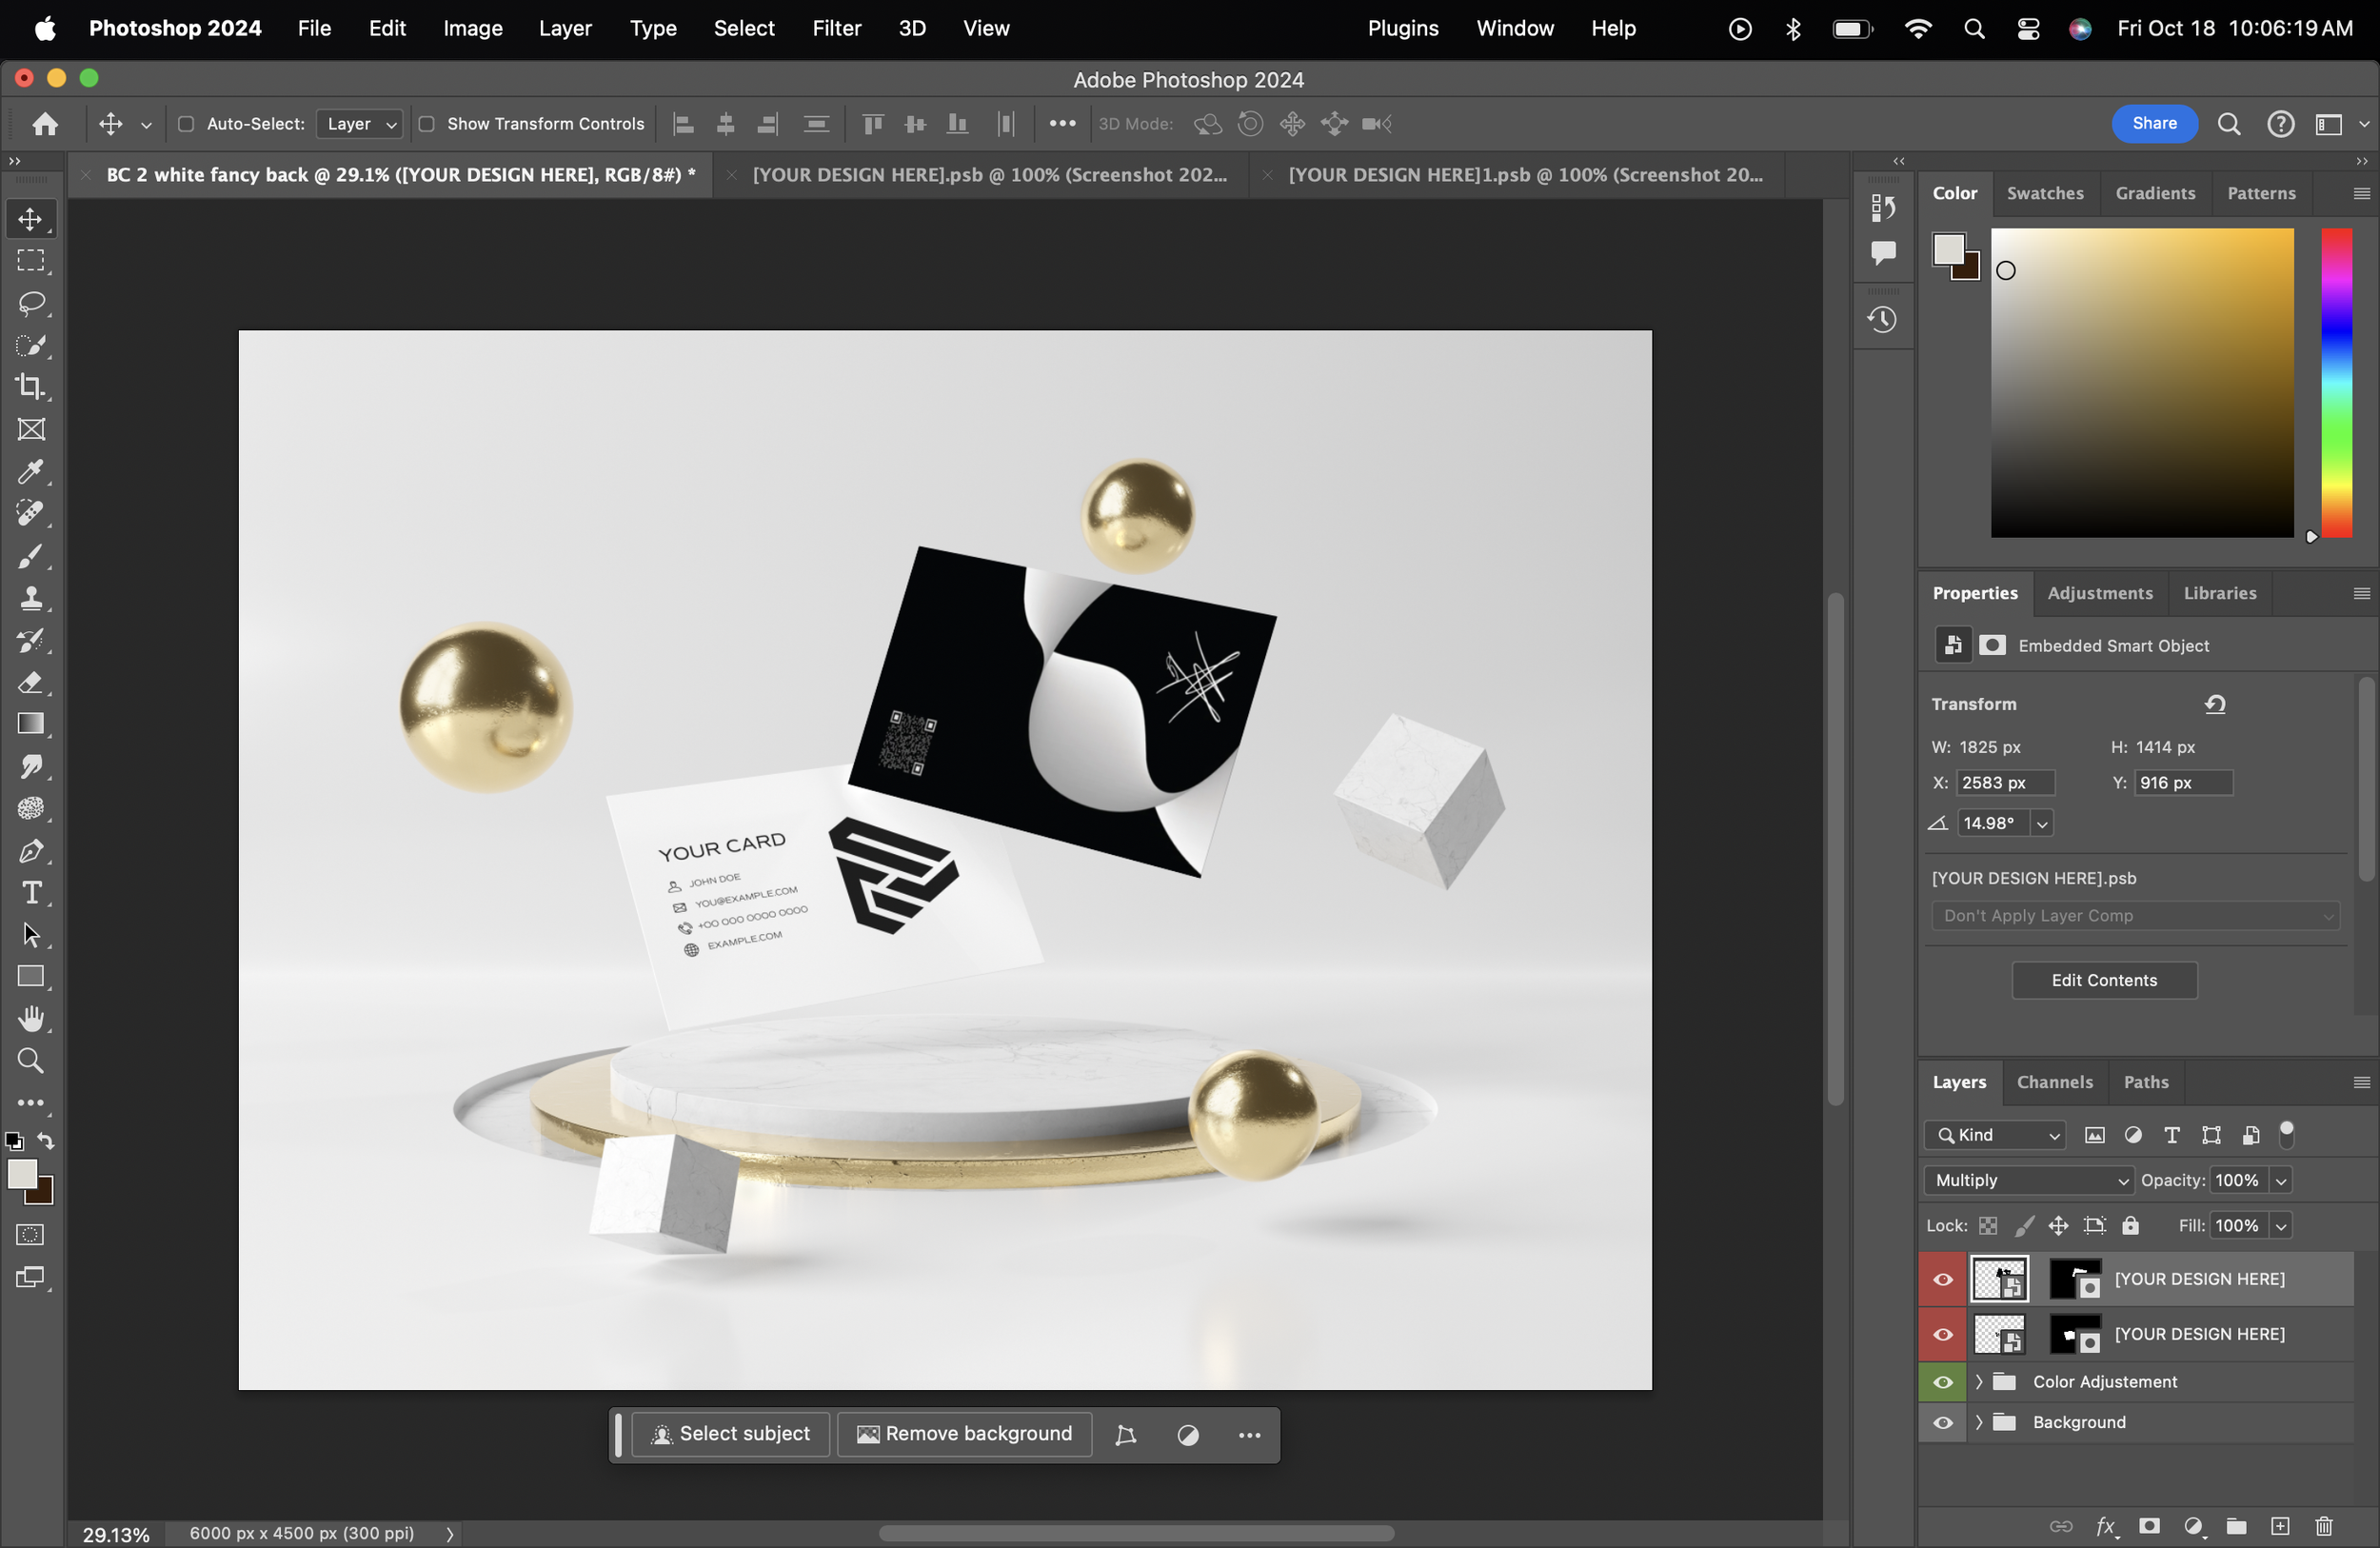
Repeat the process for any other red layers to complete the mockup.
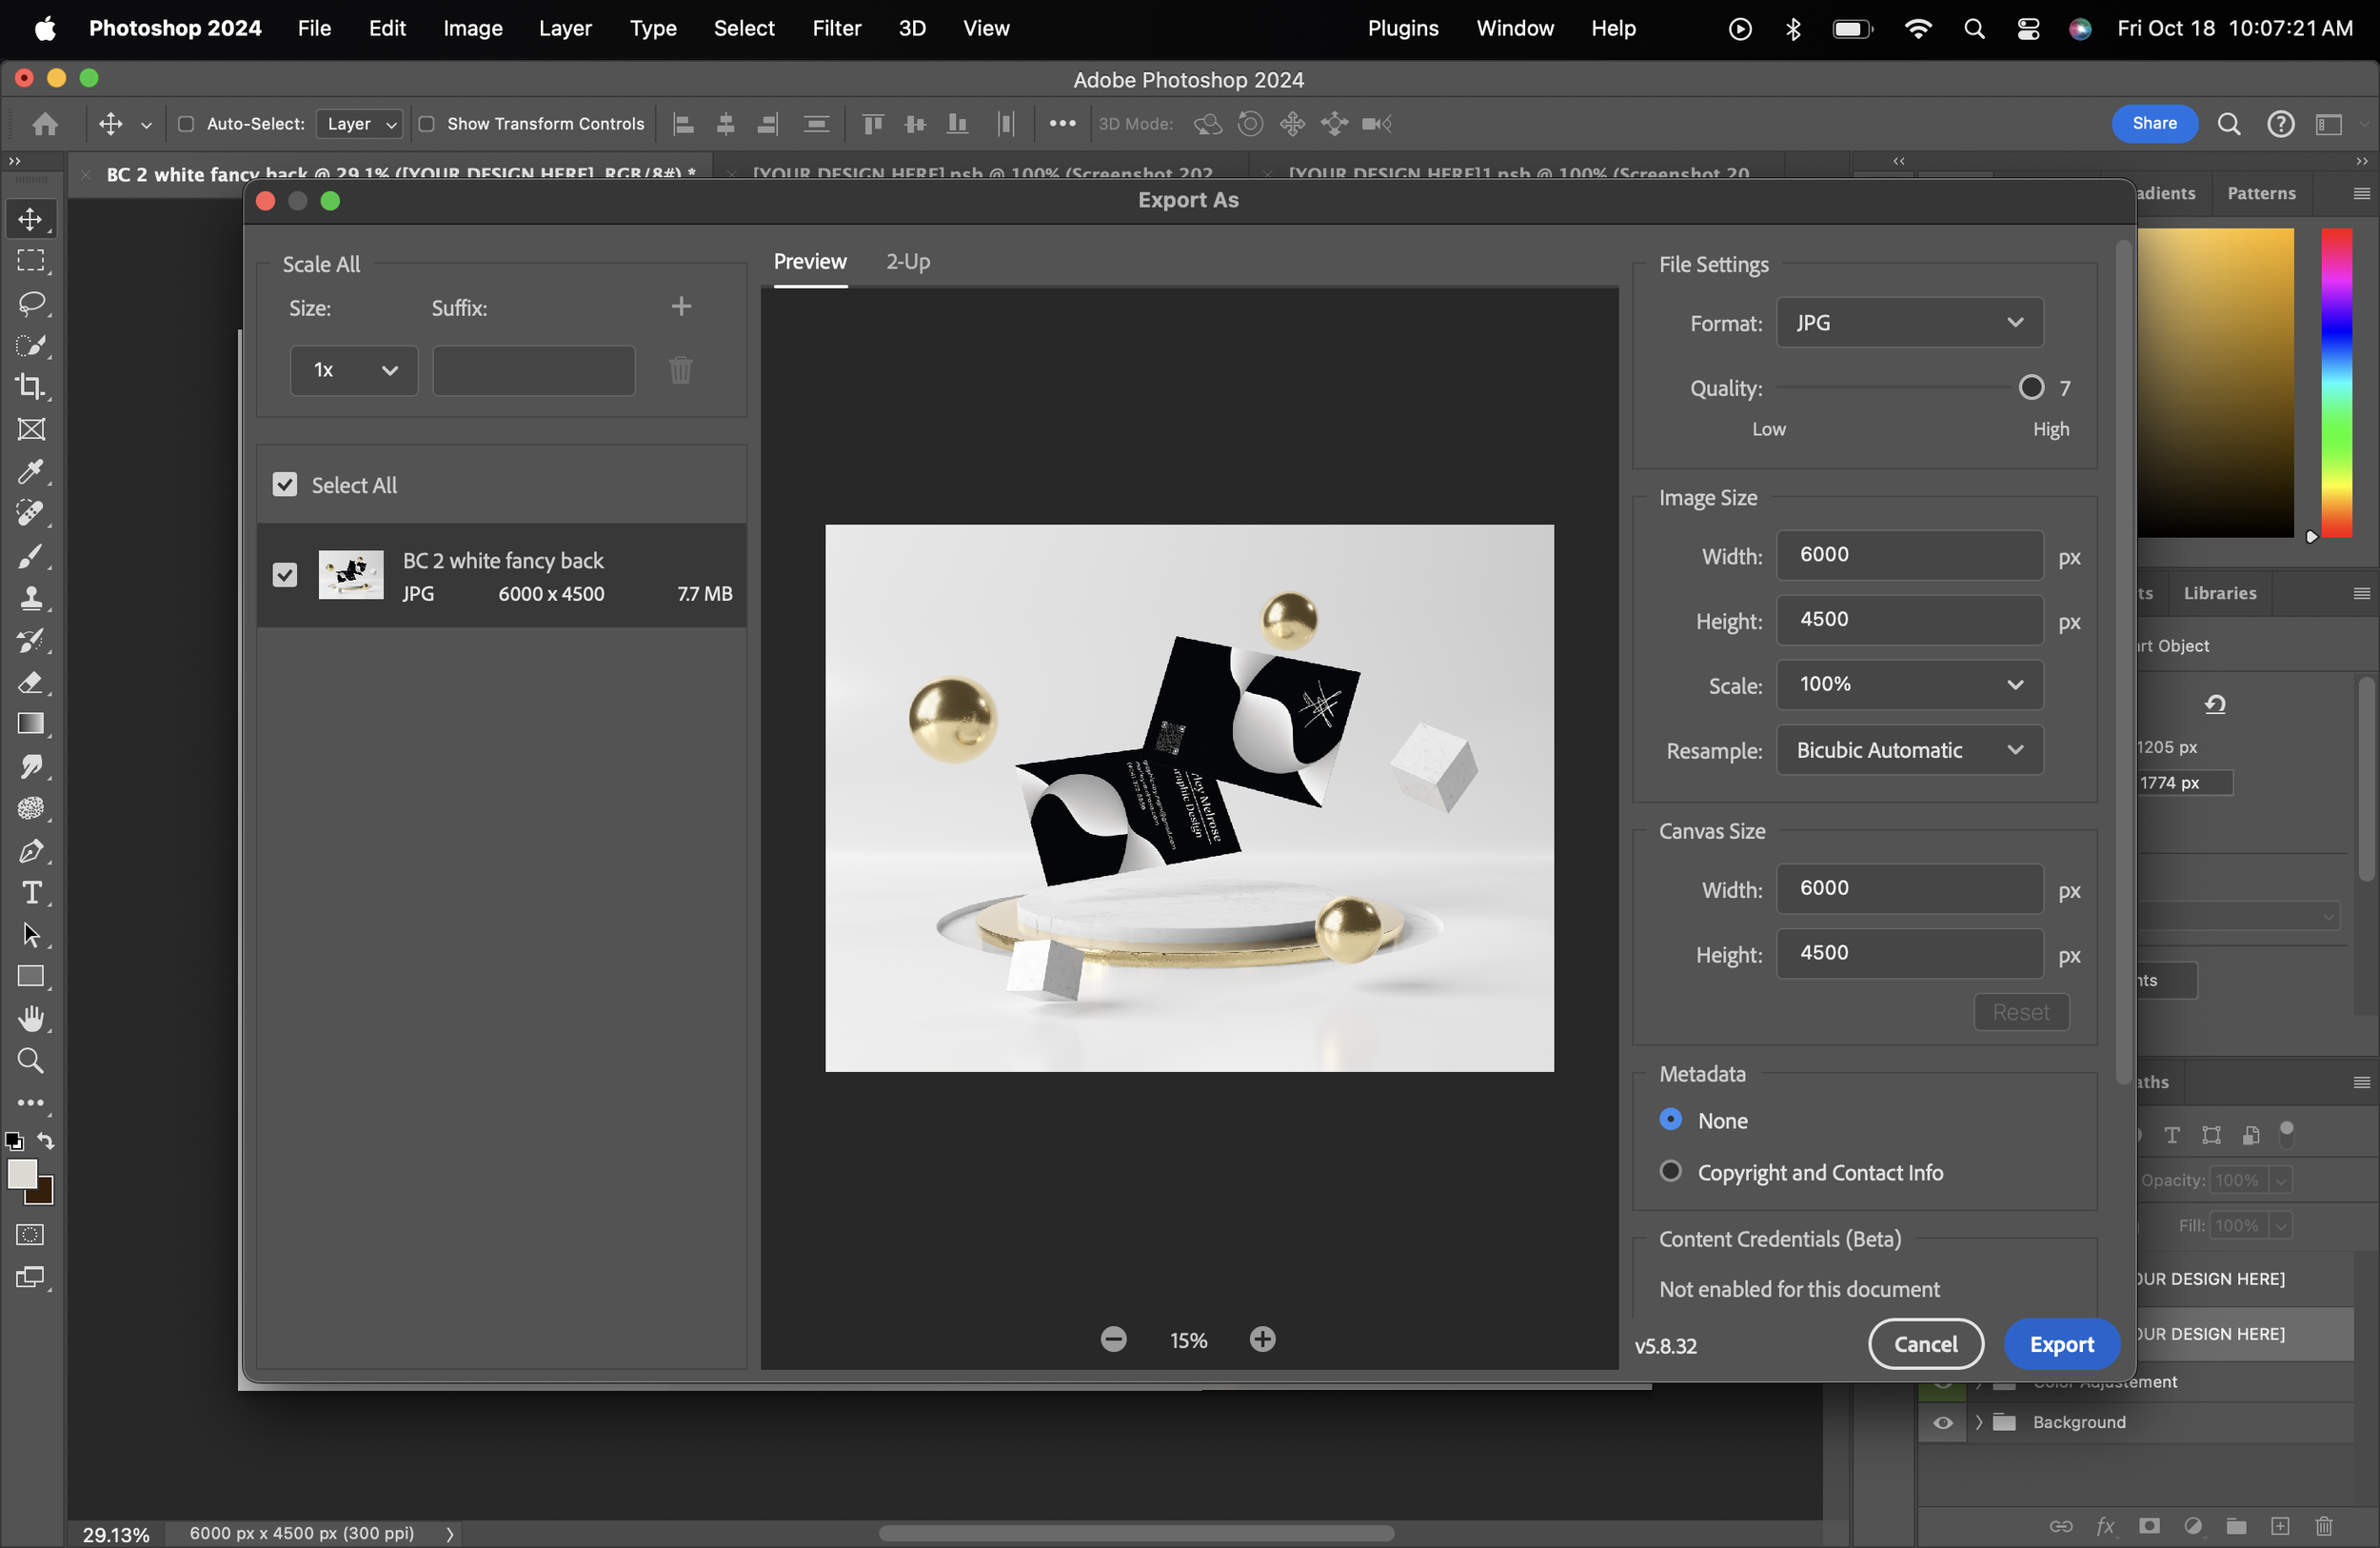
When you’re finished, save the mockup by going to File > Export > Export As.
Ensure the export settings are at the highest quality and formatted as a JPEG. Once the settings are arranged, click Export.
Here are a few examples of mockup results.
Have fun enhancing your design presentations!
Are there other ways to enhance your portfolio that you'd like to explore?

