How to setup a document for print
Setting up a document for print in Adobe Illustrator can be tricky. Here are step-by-step instructions to help you get started.
Open a new file in Adobe Illustrator and change the measurement units from inches to millimeters.
In the "Bleed" section, adjust each box from 0 mm to 5 mm. If your document is in RGB mode, switch it to CMYK. CMYK ensures accurate color reproduction for printed designs, while RGB is ideal for digital and web use.
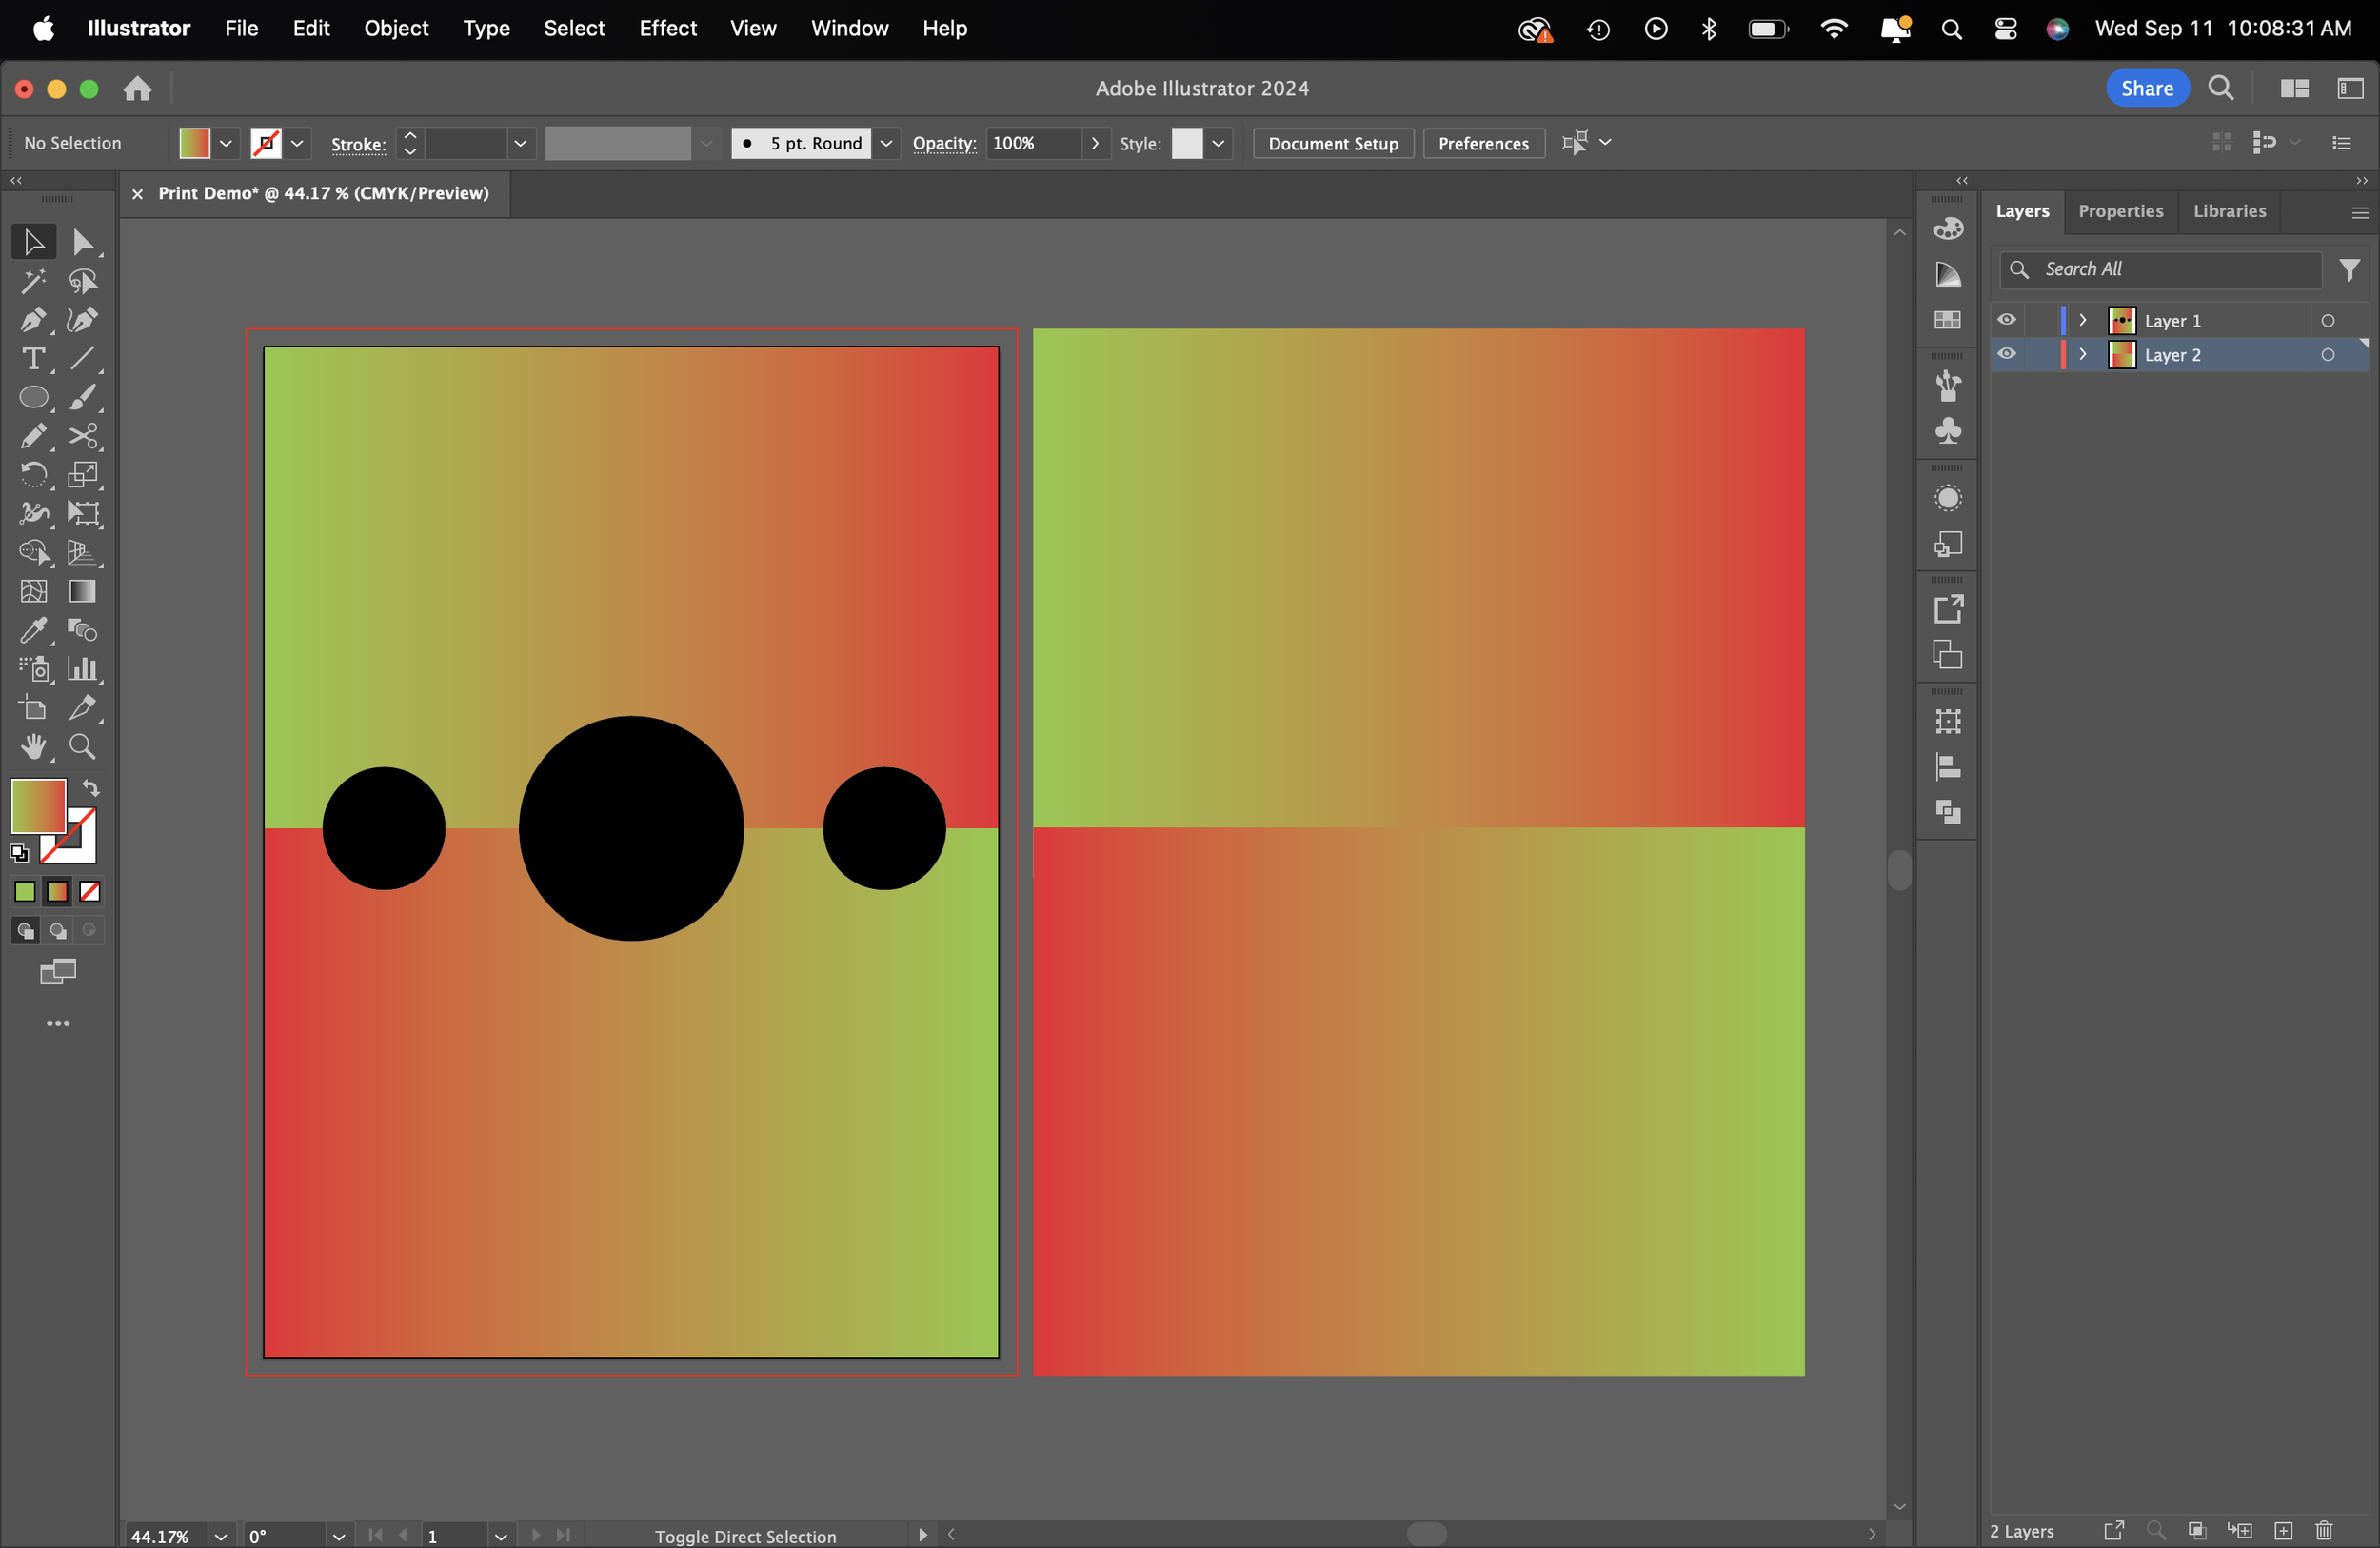
Once your document is created, you should see a red outline around it, indicating the bleed area. This line won't appear in the final print, so it can be ignored while designing.
Adding a bleed is crucial to ensure your design prints cleanly along the edges. To add a bleed, extend your design beyond the artboard. You can do this by selecting the entire image or background and resizing it to fit the red border.
Alternatively, create a new layer, copy and paste the background, place it beneath the original design, and enlarge it to fit the bleed area.
Before saving, verify that your document is in CMYK mode by navigating to File > Document Color Mode > CMYK Color.
To save your work, go to File > Save As, and choose PDF. In the save options, select "Marks and Bleeds" on the side panel, then check "Trim Marks" and "Use Document Bleed Settings." Click Save PDF.
To confirm your file is print-ready, open the PDF and look for crop marks on all four corners. This ensures your design will be properly aligned when printed.
Have fun printing!


